A wedding photographer friend posted yesterday asking how some images he’s seen could possibly be done.
The images essentially look as if you are looking at a reflection on a glass showing a subject that is blocking the light from the sky and causing the part of the glass where their reflection blocks the light, to reflect some background image.. for instance a cityscape, or in the example someone posted in response – from Davina + Daniel’s site, a landscape with a volcano in it… presumably the backdrop for the couple’s wedding.
Please note that I am in no way representing that Davina+Daniel or any other photographer used this technique or any photoshop technique to create their art. This is a tutorial for accomplishing a similar result, no more, no less.
Here’s the ending image for this tutorial, so you have an idea of what I’m talking about. I would stronly suggest you do take a look at the photo on Davina+Daniel’s site above, unlike my photo below that one was clearly shot with the purpose of creating that final image and it therefore works significantly better than the example below as it meets more of the “suggested requirements” I’ll mention.
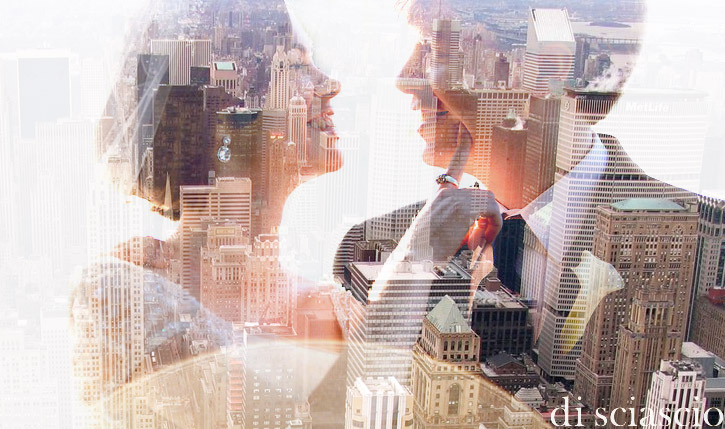
Ok, so my fellow wedding photographers (and other photographers of course)… how could that be done?
Well my friend’s question resulted in a number of possible answers… a few of which were:
1. a complex combination of glass and possibly mirrors
2. the cityscape is actually a transparency print placed near a glass upon which the couple is reflecting
3. done using the multiple exposure feature found in most Nikon cameras available during the past decade and newly introduced by Canon on the 5D Mark III
That last answer is the one that got most support and it may indeed be how these images were created. One thing is for (almost) sure… there’s probalby no way that these images can be done in camera with just a single exposure… though the jury may still be out on that. The problem lies mostly with the fact that the portraits all appear to be shot with long lenses… and yet we have depth of field such that the couple reflected in the mirror is in perfect focus… as are buildings half a mile away.
Ok, enough of the “how did they do it” stuff… I don’t really know how THEY did it. But I can tell you how YOU can do it, easily and consistently out of camera.
Ok, one more thing about the multiple exposure hypothesis… there are two problems with that approach:
1. When you use the feature you snap the first shot and then you have to snap the second… just like with multiple exposures in film… so you cant’ be as creative as you can with the technique because if you decide you want the backround to be something that’s a 5 minute walk away… that camera is useless for those 5 minutes.
2. If you shoot the couple and then after you take the shot they change their expression to a much better one… you’re screwed. Same if you grab a fantastic shot of the couple but then find a less than ideal background… only to find a perfect background 4 seconds later.
Ok, so on to the technique.
Here is what the two source images for the above looked like:
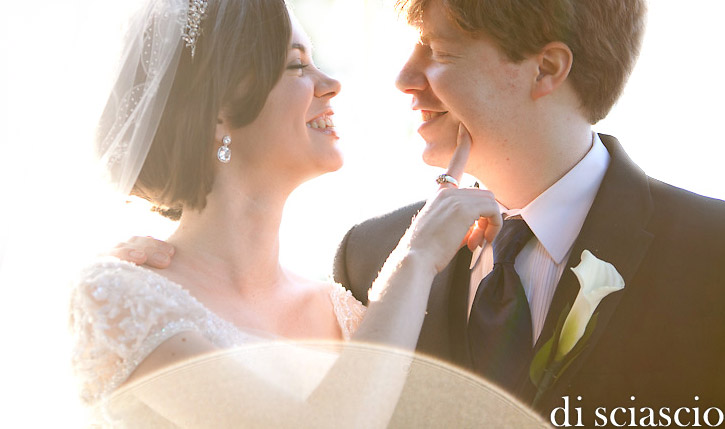
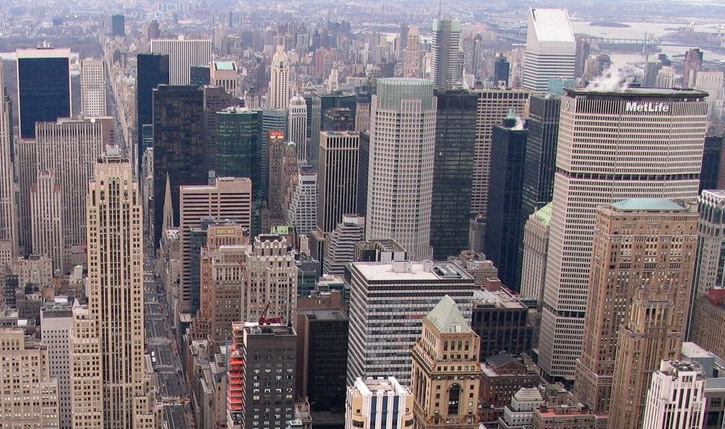
The technique is pretty easy once you have suitable images.
Simply place the couple’s image over the background image, in Photoshop, and set the couple image’s blend mode to “SCREEN”
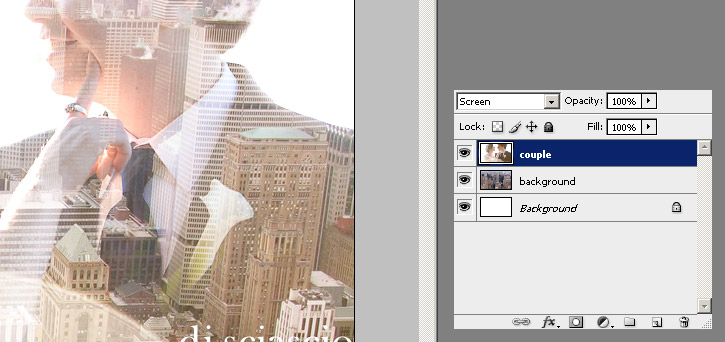
Where the couple image is pure white the end image will be pure white showing none of the background. Where the couple image is black the ending image will show the background image fully… and in between the two images will blend.
Ideally your source images should meet these criteria:
The couple (or subject) image should:
1. Be a silohuette or near silohuette… with a blown out or nearly blown out sky and your subjects probably exposed for the highlights along the edge of their profiles (this is where my image fails, and Davina+Daniel’s doesn’t their subjects are exposed much more dark)
2. Preferably only include the subjects with no other background elements as the geometry of reflection will then start falling apart if there’s other stuff in the image
The background image should:
1. Make sense as a background image in terms of scale and angle (this is hard to explain in words but basically you need the background to work as a believable reflection in a window when shot with whatever lens you’re shooting the subject… in fact it couldn’t hurt to actually SHOOT the background as a reflection off a surface if one is available… shooting with the same lens used for the subject … at a similar height angle…
2. Probably consist of something that is randomish and texturish enough to not cause your brain to melt down when looking at the image… cityscape – yes… mountainscape – yes… forest yes… group of 200 people… yes… 4 dudes, probably not. Though these aren’t rules, just suggestions.
Anyway, before I mention some “refinement” things you probably will want to do… and show you the step by step, let me point out that there’s at least one pro shooter who I totally respect who insists this can be done without photoshop trickery… I’ll prolly find out at some point but won’t post about it… I guess it’ll be one of those things where you’ll have to pay the price of admission (I attended his workshop) … I can decide to give away what I figure out but it’d be crass to give away someone else’s gift to me.
Ok, so on to the refinements…
here’s what my image looked like with just the couple over the cityscape in SCREEN mode.
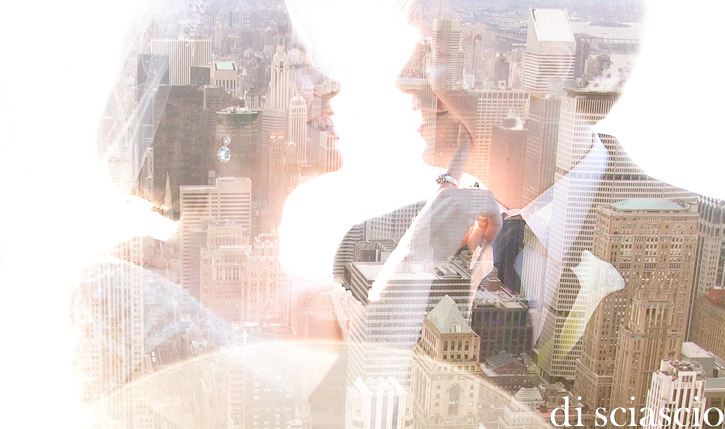
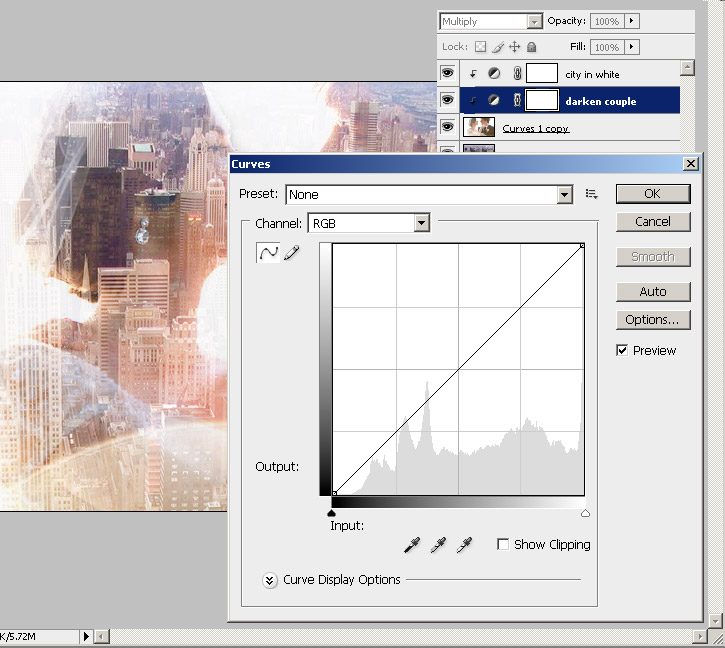
It kind of works already, but the couple is more washed out than I’d like. So I decided to darken the couple by creating a Curves adjustment layer, not making any changes to the curve but setting the adjustment layer mode to MULTIPLY (this is a neat trick to just darken an image). Of course the adjustment layer is “clipped” (applied only to) the couple photo.
Here are the layers:
and here is the resulting image:
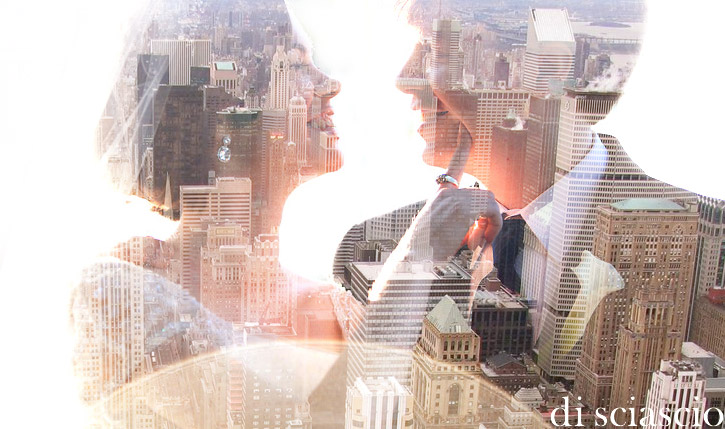
That’s A LOT more like it. And yeah I know I say A LOT but the change is subtle… well yeah I don’t do the crazy editing stuff… so subtle can be A LOT for me 🙂
Ok, there’s one more issue. We want to really give the illusion that there’s a reflection going on. Under most circumstances if you were to see this kind of thing happening in real life, the blown out areas would be FAR LESS REFLECTANT than the dark areas, but some reflectivity would probably be retained.
So we need to have some of the background show even through where the couple image is pure white.
Many ways to skin that cat, I chose to create a levels adjustment layer and use it to essentially slightly darken the highlights of the couple photo (note the output levels set to 0-235 rather than 0-255) and also tweak the shadows and midtones (notice the adjustments to the input levels)
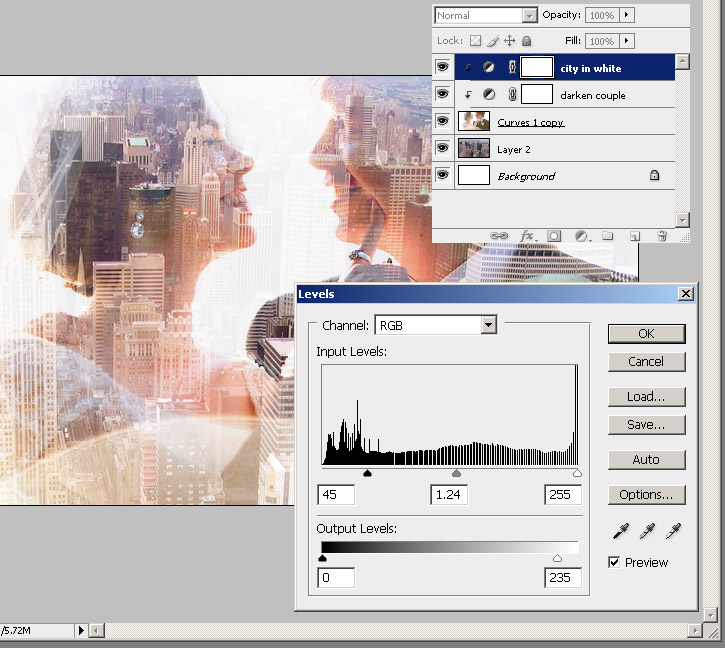
and again, the final image… showing some reflectance even in the bright areas.

If you found this useful or interesting please let me know in the comments.
Ciao!
Alessandro
P.S. And yes I do realize that doing this in Photoshop lacks all of the elegance that you might get from doing it in camera… I have no answer to that. I agree, but at the same time if the end result is a fantastic image your clients love… I find it hard to criticize the artist for using more than just one paintbrush.
